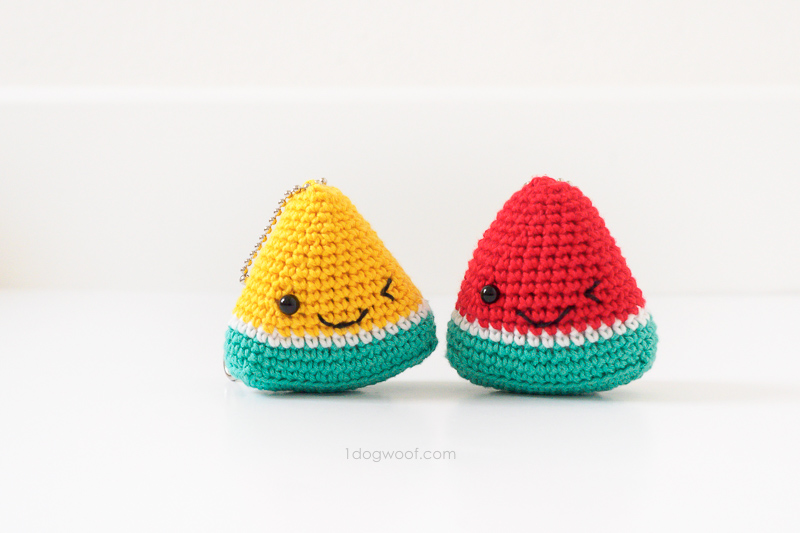
1dogwoof.com
- 1 package of Lion Brand BonBons in Beach, using the red, green, yellow, white and black
- 1 Clover USA crochet hook C/2.75mm*
- 1 6mm safety eye
- scissors
- tapestry needle
- ball chains with clasps*
- lobster claw swivel clasps*
ABBREVIATIONS
- sl st – slip stitch
- ch – chain stitch
- sc – single crochet
- sp – space
- corner – [1 sc, 2 ch, 1 sc]
- BLO – back loops only
- sc2tog – single crochet decrease: Insert hook into front loop of next st. Without yarning over, insert hook into front loop of next st. Yarn over. Pull through 2 loops on hook. Yarn over, pull through remaining loop on hook.
PATTERN NOTES
- Skill level Beginner.
- Gauge doesn’t matter on this project, as long as it’s tight enough to prevent the stuffing from coming out.
- Pattern is worked in seamed rounds.
- First st in each round is worked into same st as join.
Watermelon Amigurumi Keychain Instructions
Round 1: (in GREEN) Ch 14. Work 1 sc into the 2nd ch from hook. Work 1 sc in each of next 11 st, [1 sc, 2 ch, 1 sc, 2 ch, 1 sc] in next ch (this turns the corner), 1 sc in each of next 11 st, [1 sc, 2ch, 1sc, 2 ch] in last ch. Join to first sc with sl st.Round 2: Ch 1. Work 1 sc in each of next 13 st, 1 corner in ch 2 sp, 1 sc in next st, 1 corner in ch 2 sp, 1 sc in each of next 13 st, 1 corner in ch 2 sp, 1 sc in next st, 1 corner in ch 2 sp. Join to first sc with sl st.
Round 3: Ch 1. Work 1 sc in each of next 14 st, 1 corner in ch 2 sp, 1 sc in each of next 3 st, 1 corner in ch 2 sp, 1 sc in each of next 15 st, 1 corner in ch 2 sp, 1 sc in each of next 3 st, 1 corner in ch 2 sp, 1 sc in next st. Join to first sc with sl st.
Round 4: Ch 1. In BLO, work 1 sc in each sc st around, skipping ch sp. Join to first sc with sl st. (44)
Round 5: Ch 1, Work 1 sc in each st around. Join to first sc with sl st. (44)
Round 6: Ch 1. Work 1 sc in each of next 4 st, 1 sc2tog, 1 sc in next st, 1 sc2tog, 1 sc in each of next 17 st, 1 sc2tog, 1 sc in next st, 1 sc2tog, 1 sc in each of next 13 st. Join to first sc with sl st. (40)
Round 7: (in WHITE) Ch 1. Work 1 sc in each st around. Join to first sc with sl st. (40)
Round 8: (in RED) Ch 1. Work 1 sc in each of next 11 st, 1 sc2tog, 1 sc in each of next 5 st, 1 sc2tog, 1 sc in each of next 11 st, 1 sc2tog, 1 sc in each of next 5 st, 1 sc2tog. Join to first sc with sl st. (36)
Round 9: Ch 1. Work 1 sc in each st around. Join to first sc with sl st. (36)
Round 10: Ch 1. Work 1 sc2tog, 1 sc in each of next 9 st, 1 sc2tog, 1 sc in each of next 5 st, 1 sc2tog, 1 sc in each of next 9 st, 1 sc2tog, 1 sc in each of next 5 st. Join to first sc with sl st. (32)
Round 11: Ch 1. Work 1 sc in each st around. Join to first sc with sl st. (32)
Round 12: Ch 1. Work 1 sc2tog, 1 sc in each of next 7 st, 1 sc2tog, 1 sc in each of next 5 st, 1 sc2tog, 1 sc in each of next 7 st, 1 sc2tog, 1 sc in each of next 5 st. Join to first sc with sl st. (28)
Round 13: Ch 1. Work 1 sc in each st around. Join to first sc with sl st. (28)
Round 14: Ch 1. Work 1 sc2tog, 1 sc in each of next 5 st, 1 sc2tog, 1 sc in each of next 5 st, 1 sc2tog, 1 sc in each of next 5 st, 1 sc2tog, 1 sc in each of next 5 st. Join to first sc with sl st. (24)
Round 15: Work 1 sc in each st around. Join to first sc with sl st. (24)
Add the eyes and mouth
- Eye – Insert safety eye between the 3rd and 4th red rounds, 2 st to the right of the sc2tog st.
- Wink – With black yarn, insert needle from inside out, between the 2nd and 3rd red rounds, 2 st to the left of the sc2tog st (starting point). Insert the needle outside in, between the 3rd and 4th red rounds, approximately the same width as the safety eye (middle point). Insert the needle inside out, between the 4th and 5th red rounds, directly above the starting point (end point). Insert the needle outside in, at the middle point, to complete the wink.
- Smile – Embroider on a smile centered and just slightly below the eyes.
Round 17: Ch 1. Work 1 sc in each st around. Join to first sc with sl st. (20)
Round 18: Ch 1. Work 1 sc2tog, 1 sc in next st, 1 sc2tog, 1 sc in each of next 5 st, 1 sc2tog, 1 sc in next st, 1 sc2tog, 1 sc in each of next 5 st. Join to first sc with sl st. (16)
Round 19: Ch 1. Work 1 sc in each st around. Join to first sc with sl st. (16)
Round 20: Ch 1. Work 2 sc2tog, 1 sc in each of next 4 st, 2 sc2tog, 1 sc in each of next 4 st. Join to first sc with sl st. (12)
** Stuff the watermelon firmly to fill out the shape.
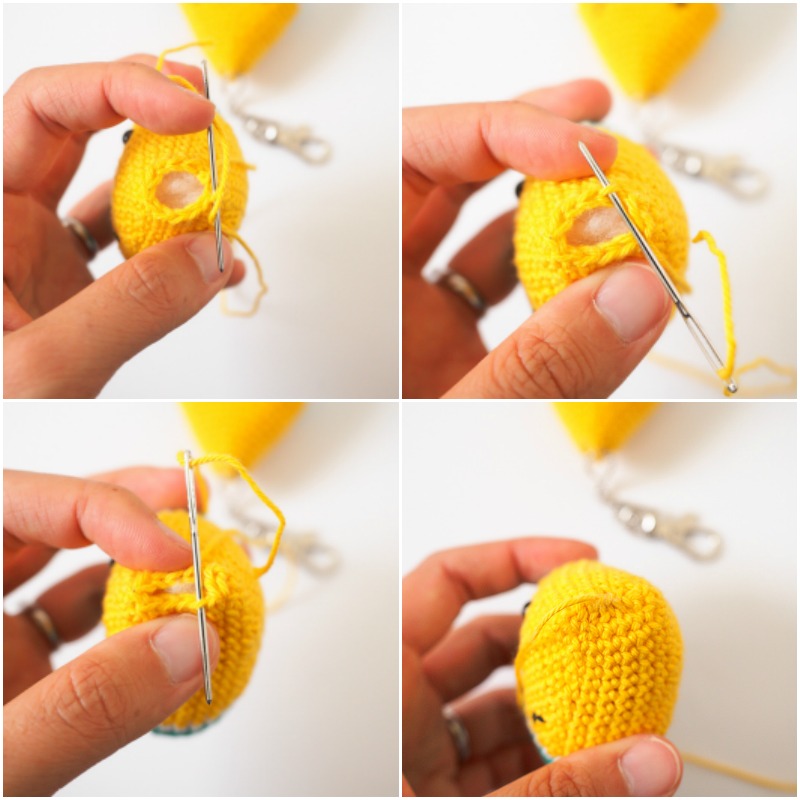
Cut yarn, leaving a tail. Squeeze the round together, aligning the 4 sc to the 4sc. Use the mattress stitch to close. Fasten off and weave in ends.

Insert the ball chain clasp through any available stitch on the top of
the watermelon. I used a needle to help things along – it takes some
effort, but you can always find a small gap to get the chain through.
Once the chain is attached, just close the ball chain around a lobster
clasp and you’re all set!
On my first keychain, I created a loop at the top of the watermelon to
insert the ball chain, but it looked a bit weird, so I adjusted to
insert the ball chain straight through the top of the watermelon
instead.

Nessun commento:
Posta un commento